Counter App

How to Organize a Clinic Supply Room on Android
Key takeaways
To organize a clinic supply room with an app, first re-plan the room so each item has one home, then mirror it in Counter App — Tally & Clicker as categories, one counter per shelf unit and one tag per item with its par level as target. A short daily count walk feeds a weekly export for ordering.
- Organizing a clinic supply room starts on paper, with one home per item, fast movers at waist height and items grouped by clinical task rather than by supplier.
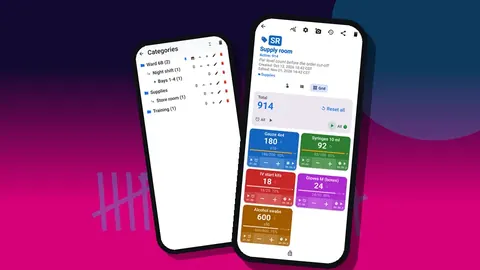
- Counter App — Tally & Clicker mirrors a clinic supply room as categories for clinic, room and shelf unit, one counter per unit and one tag per item.
- A supply item's par level becomes its tag target in Counter App, so the progress bar shows how full each shelf is after the daily restock walk.
- Wipeable shelf-edge labels with a QR code and a printed code link each clinic shelf to its tag, with typing as the fallback when a label is scratched.
- Counter App is a counting tool for consumables and does not replace a clinic's ordering system, expiry policy, infection-control rules or controlled-item procedures.
A clinic supply room tends to organize itself by accident. Boxes go where there was space on delivery day, the most-used items migrate toward the door, and the shelf labels describe what was there two reorganizations ago. Nobody planned it that way; it simply happened one busy week at a time.
This guide walks through a deliberate reset: map the room, mirror that map in a counting app on Android, attach par levels to each item, and turn a short daily walk into a weekly restock list. The tool used throughout is Counter App by GiveMeMood, but most of the thinking applies to any method you choose.
Scope note: this is about counting consumables and keeping shelves stocked. It does not replace your clinic's ordering system, expiry policy, infection-control rules or any procedure for controlled items. Keep patient information out of the app entirely.
Why Start With the Room Rather Than the App?
Before you open the phone, stand in the doorway with a sheet of paper and sketch the room. Draw each shelving unit, cabinet and cart. Number them in walking order, starting from the door and moving clockwise, so the eventual counting route never doubles back.
Then list what actually lives on each unit today, not what the label says. You will probably find three kinds of surprises: items stored in two places, items nobody has used in months, and items that run out constantly because they sit on the bottom shelf behind something heavier. Write each of those down. They are the reasons the room needs a rethink, and the new layout should fix them before any counting starts.
A few layout principles worth applying while you are sketching:
- One home per item. If gloves in size M live in two cabinets, pick one. Split storage is the single biggest cause of counts that never add up.
- Fast movers at waist height. The items restocked daily should be easiest to see and reach.
- Group by task, not by supplier. Wound-care items together, IV-start items together, specimen supplies together. Staff look for things by what they are doing.
- Leave a gap for deliveries. A small empty shelf near the door gives incoming boxes somewhere to sit until they are put away properly.
Once the paper plan feels right, move the stock. Only then is it worth building anything digital.
Mapping Zones to Counters and Categories
The app offers three building blocks, and the trick is to give each one a clear job.
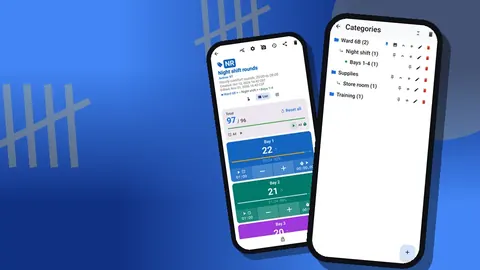
Categories hold the structure of the room. They nest up to three levels, which fits most clinics neatly: Clinic → Supply room → Shelf unit. If you have a single room, you might instead use Supply room → Zone → Unit. Give each category its own color so a glance at the list tells you which part of the room a counter belongs to, and pin the category you use most so it stays on top.
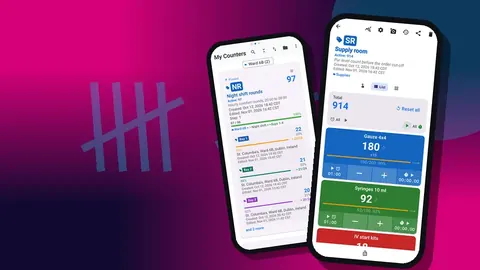
Counters represent a counting unit, usually one shelving unit or one cabinet. Name them after the physical label you put on the furniture, for example "Unit 3 — Wound care". The counter's code field takes a short identifier such as "U3", which shows as a badge in the list and makes scanning the screen faster.
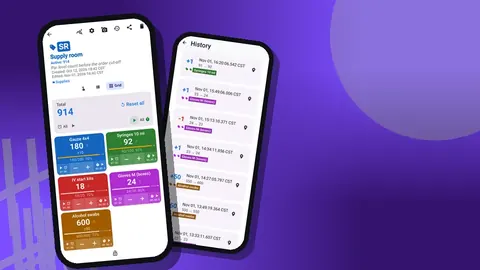
Tags sit inside a counter and represent individual items: "Gauze 4x4", "Syringes 10 ml", "Alcohol swabs". Each tag carries its own value, step and target, so one counter can hold every item on that unit.
A useful test of the structure: could a colleague who has never seen the room find a specific item by looking only at the app? If the answer is yes, the mapping is good enough.
Labeling Shelves With QR Codes
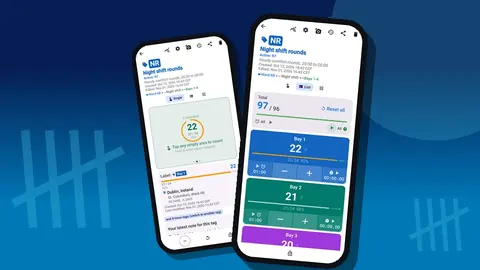
Printed labels with a QR code on each shelf edge tie the physical shelf to its tag in the app. Every tag can store a barcode or QR code, captured with the camera or typed in, so the label and the tag carry the same identifier.
Practical tips for labels in a clinical space:
- Print the human-readable item name and the counter code under each QR, so the label still works if a phone is not at hand.
- Laminate or use wipeable label stock; supply rooms get cleaned with products that destroy plain paper.
- Place the code on the shelf edge, not on the box. Boxes leave; shelves stay.
- If a label gets scratched or the light is poor, you can type the code instead of scanning it. Keep the code short and printed in plain characters for exactly that reason.
You can also use manufacturer barcodes already on the packaging, but test a few first with your own phone before committing, and keep the shelf-label approach as the fallback.
How Do Par Levels Work as Targets?
A par level is the quantity you want on the shelf after restocking. In the app, it becomes the tag's target.
There are two ways to model it, and it helps to pick one for the whole room:
- Count what is on the shelf. Set the target to the par level and count up as you tally the stock. The progress bar then shows how full the shelf is.
- Count what was used. Start each period from the par level and count down with each item taken. Targets support counting down to a goal, with an optional sound or vibration alert when the value reaches it, which is a handy cue that a reorder point has been hit.
Most small clinics find the first approach easier, because it matches how people already count during a stock check. The second suits rooms where staff are willing to tap each time they take something, which is rarer than people hope.
Set the step to match how items come off the shelf. If swabs are counted by the box of 100, a step of 1 per box is cleaner than tapping a hundred times. Steps can be any value from 1 to 100, separately for each tag.
When you first set pars, be modest. It is easier to raise a par after two weeks of evidence than to explain why a shelf is overflowing.
The Daily Restock Walk
The routine that makes the system work is short: one person, one route, one pass through the room at the same time each day. Early morning before patients arrive or the last half hour of the day both work well.
On the walk:
- Open the counter for the first unit in List view, which shows every tag as a row with its value, minus and plus buttons and progress toward target.
- Count each item and adjust the value. If a shelf has many items, Grid view shows them as colored tiles instead, which some people find quicker to scan.
- Anything below par gets a note on the tag, such as "two boxes short" or "one damaged pack removed".
- Move to the next unit in walking order.
If your hands are full or you are wearing gloves, the volume buttons can count for you. The feature is off by default and can be switched on in settings, with remappable keys and per-key sound and vibration. Some devices may still show the system volume bar when you press them.
Lock a counter once its unit is done. Locking protects it against accidental taps when the phone goes back into a pocket.
Reading the Week Before You Order
Before placing an order, look at what the week actually did. The dashboard shows the overview total against target, increments versus decrements, a seven-day activity bar chart and a pie chart split by tag. A spike on one day often explains itself: a busy clinic session, a training day that used practice kits, or a delivery counted twice.
The history screen adds detail when something looks odd. Every count is logged with its time and the before-and-after value, so you can see whether a shelf dropped gradually or all at once. That difference matters: gradual usage suggests the par is too low; a sudden drop usually means items were moved or borrowed rather than used.
Weekly Export for Ordering
Once a week, export the room. The app writes CSV, Excel (XLSX) or an HTML report with embedded photos, and you choose which sections to include: Summary, Events, Notes and Locations.
For an ordering list, Summary plus Notes is usually enough. The Summary gives current values against targets; the Notes carry the context that a number cannot, such as "switch to the smaller pack size". The Events section is useful when someone asks why usage changed, because it carries every individual count.
A simple spreadsheet habit helps: keep one workbook and paste each week's export into a new sheet named by date. After a month you have an easy comparison without any extra tools.
How Can Clinics With Several Rooms or Sites Share a Setup?
Multiple rooms fit into the same category tree; give each room its own branch. Separate sites can do the same, or each site can keep its own phone.
There is no live sync between phones, so decide early who owns which counters. To move a setup to another device, create a backup ZIP. The backup can be limited to chosen counters and categories, and photos can be compressed if you like. On the receiving phone, the import shows a preview and asks how to handle duplicates: replace, copy or skip. Copy duplicates the counters, which is useful for cloning a room template to a new site.
Retiring Items Without Losing Their History
Products change. A supplier discontinues a dressing, or the clinic switches glove brands. Rather than deleting the old tag straight away, set its target to zero and add a note explaining the change. That keeps the history readable for the next export.
When a whole unit is removed, deleting its counter moves it to the trash, where it can be restored. Categories have their own trash as well. It is a safety net, not an archive, so export before deleting anything you might need for later comparison.
A First-Week Plan
- Day 1: sketch the room, decide one home per item, move stock.
- Day 2: build categories and counters; create tags with steps and par targets.
- Day 3: print and stick shelf labels; test a dozen scans.
- Days 4–6: run the daily walk; note every place the structure feels awkward and fix it.
- Day 7: look at the dashboard, export to Excel and place the first order from the list.
After that, review pars every few weeks. The room will tell you where they are wrong.
Counter App — Tally & Clicker runs on Android 12 or later and is free to download with no ads; try it free for 3 days, then choose a yearly or monthly plan or a one-time lifetime purchase. Get the app at counterapp.online.
Frequently asked questions
Can clinic shelves be labeled with QR codes that open the right item?
Yes. Each tag can store a barcode or QR code, scanned with the camera or typed in by hand.
How do supply par levels work in a counter app?
Give each tag a target. Counters and tags can count up or down to a goal, with an optional sound or vibration alert when it is reached.
Can the clinic supply count be exported as a restock list for the person who orders?
Yes. Export to CSV, Excel (XLSX) or an HTML report; Summary plus Notes is usually enough for an ordering list.
Is clinic supply data stored in a cloud account?
Counter App has no account and no Counter App cloud; the counts are stored on the phone. To move them to another device, create a backup ZIP and import it there.
Does a counting app replace a clinic's inventory or ordering policy?
No. Counter App is a counting tool, so the organization's procedures for ordering, expiry checks and controlled items still apply.
Should patient information be entered in a supply counting app?
No. Keep patient information out of the app entirely and use it only for counting consumables.
What should happen to a discontinued dressing's tag?
Set its target to zero and add a note explaining the change rather than deleting the tag at once, so the item's history stays readable in later exports.