Counter App

Count Sets and Reps with Barcode Labels on Gym Kit
Key takeaways
To count sets and reps with barcode gym labels, give each station a printed barcode or QR label and store the same code on an exercise tag in Counter App — Tally & Clicker. At the station, scan or type the code, count reps with taps or volume keys, start the tag's rest timer and note the load.
- Counter App — Tally & Clicker can log gym training with one counter per session template and one tag per exercise or station, each tag storing a barcode or QR value from a printed station label.
- Scanning or typing a gym station code opens the matching exercise tag, so each set becomes a tap or a volume-key press.
- Each exercise tag in Counter App has its own rest timer, so squats can rest three minutes while curls rest sixty seconds.
- Counter App counts reps and sets but has no weight column; the load lifted belongs in notes on the count event or the tag.
- Exporting a training block's Events and Notes to CSV or Excel lets a lifter pivot sets per exercise per week against the loads written in notes.
A training log fails for one boring reason: writing things down between sets is a chore, so people stop doing it. Barcode or QR labels on gym stations remove part of that chore. You walk up to the rack, the phone already knows which exercise you are on, and each set becomes one tap or one press of a volume key.
This guide shows how to build that system with Counter App by GiveMeMood on Android. It works in a home garage, a small private studio, or a commercial gym where you are allowed to stick a small label on your own kit or a clipboard.
The idea in one paragraph
Each session type (say, "Lower A") is a counter. Each exercise or station inside it is a tag. Every tag can store a barcode or QR value, its own step, its own target, a timer and a stopwatch. A printed label on the station carries the same code. When you arrive at the station you scan the label or type the code, open that tag, and count. The tag's value is your rep or set total, the history keeps the timestamp of every count, and notes carry the load.
You do not need any of the barcode side to count reps. It is a convenience layer that pays off when there are many stations, several people sharing one phone, or a circuit where you move fast.
How should gym station labels be made?
Keep the labels dull and robust:
- One code per station, not per piece of kit. "SQUAT-RACK-1" is more useful than a label on each plate.
- Print the human-readable code under the symbol. If the camera struggles with a scuffed or glossy label, you can type it on the manual entry screen instead.
- Use a material that survives chalk and sweat. Laminated paper or vinyl label stock works; plain paper curls within a week near a fan.
- Stick it where the phone naturally goes. The upright of a rack at chest height, the top of a bench frame, the dumbbell rack end cap.
- Keep a master sheet. A single printed page listing every code and the exercise it maps to lets you re-print any label in a minute.
Test each label right after printing. If the phone does not read one reliably, re-print it larger rather than living with a label you have to fight every session. This article does not recommend a specific symbology; check what your printer produces and confirm it scans on your phone.
Setting up Counter App
Start with structure, then add the codes.
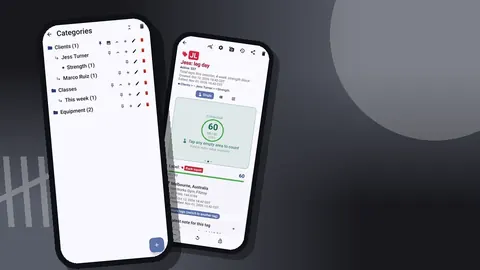
- Create a category called Training, with sub-categories such as Strength and Conditioning. Categories nest up to three levels, so Training → Strength → Lower is possible if you like detail.
- Create one counter per session template: "Lower A", "Upper A", "Circuit Friday". Give each a color and a short code in the initials field, such as LA or UA.
- Inside the counter, add one tag per exercise.
One tag per station
Open each tag and fill in:
- Label: the exercise name as you say it out loud, e.g. "Back squat".
- Color: one color per movement pattern helps when you scan the Grid view.
- Step: 1 if you count every rep; 5 or 10 for exercises you log in blocks, like skipping rope or band pull-aparts. Any value from 1 to 100 is allowed.
- Target: the planned total for the session. For 5 sets of 5 squats that is 25.
- Barcode/QR: the code from the station label.
You can also add a location to a tag (GPS, a point on a map, or a typed place). For a home gym that is noise; for a coach who trains clients in two different gyms, a typed location on each tag makes later exports clearer.
Logging a session
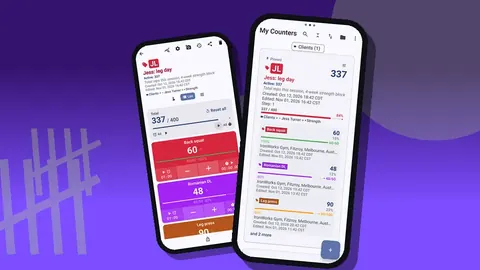
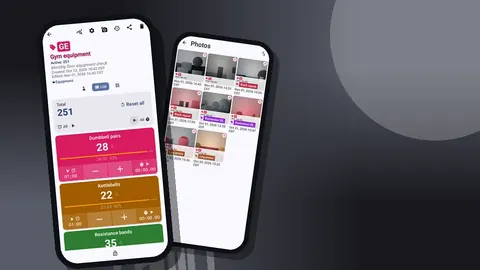
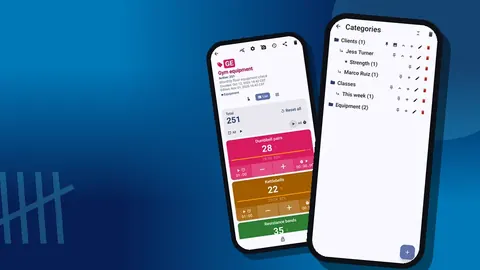
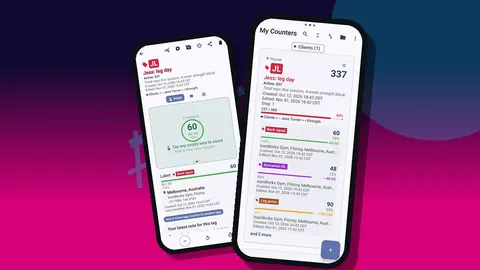
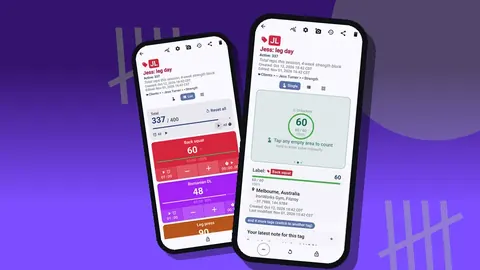
Open the session's counter and choose List view. Every exercise appears as a row with minus and plus buttons, its current value and a progress bar towards the target. A total at the top compares the session's work with the sum of all targets.
A typical flow at one station:
- Walk up, scan or type the station code, and confirm you are on the right tag.
- Do the set.
- Tap plus once per rep, or tap once with the step set to the set's rep count. Both approaches work; pick one and keep it.
- Start the rest timer.
- Add a note with the load if it changed.
Counting reps during the set is easiest with the volume keys. Enable volume-button counting in settings and the keys add or subtract a step even with the screen off, through a foreground service. You can remap which key does what and give each key its own sound and vibration. Some phones still flash the system volume bar; that is cosmetic.
If a slip adds an extra rep, press minus. The history records the correction as its own event, so nothing is silently overwritten.
How do you time rest between sets?
Timers and stopwatches are set per tag, not per session. That matters more than it sounds: squats might need three minutes of rest while curls need sixty seconds. Set each tag's timer to the rest you planned and the app handles the rest per exercise.
The timer sheet offers presets of 30 seconds, 1, 2, 3, 5 and 10 minutes, plus a manual input for odd values like 90 seconds. Countdown beeps warn you before the end, and you can choose among seven alarm sounds and eight vibration patterns. Pick a vibration you will feel through a pocket; in a loud gym the sound is often lost.
The stopwatch is useful for timed holds, carries for time or EMOM blocks where you want to see the elapsed minute. You can reset one timer or all of them at once from the counting screen.
Notes are where the load lives
A counter counts. It does not have a weight column, and pretending otherwise leads to messy data. Instead, put load and context in notes:
- "100 kg x5, belt on"
- "Felt knee on rep 4, stopped"
- "Swapped to safety bar, shoulder sore"
Notes can be attached to individual count events or to the tag itself. The All Notes screen lists them all with their tag labels and times, and you can sort that list. Before a session, scrolling last week's notes for a station tells you what to load on the bar today.
Keep notes short and in a consistent format. "Load x reps" written the same way every time is easy to read in an export later.
Reviewing progress
The history screen is an event log. Each line shows the step added or removed, the exact timestamp, the value before and after, the tag label, and icons when a note or location is attached. It answers practical questions:
- How long did the session actually take, from first to last set?
- Did rest periods creep up as the session went on?
- On which day did you stop a set early, and what did the note say?
History has no search, so scroll by date. Short sessions with clear tag names keep it readable.
Reading the dashboard
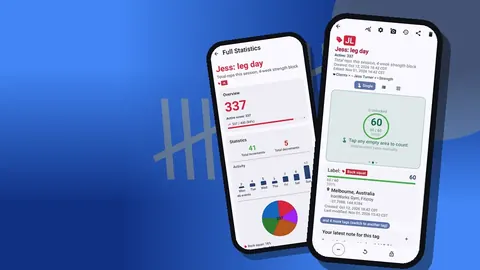
The dashboard summarizes the counter: total against target, increments against decrements, a seven-day activity bar chart, a pie chart split by tag, plus photos and notes. Three things to look at weekly:
- The bar chart, to see whether you trained on the days you planned.
- The pie, to check that accessory work is not quietly eating the session while main lifts shrink.
- Decrements, which, if high, suggest you are fixing many mis-taps and might prefer the volume keys.
Exporting a block
At the end of a four to six week block, export the counter. You can export to CSV, Excel (XLSX), or an HTML report with embedded photos, and choose which sections to include: Summary, Events, Notes, Locations.
For training analysis, Events plus Notes is the useful pair. Events give timestamps and values; notes give loads. In a spreadsheet you can pivot sets per exercise per week and line them up against the loads you wrote. Archive the file with the block name so next year you can compare.
Circuits and stations in a studio
Labels shine in circuit classes. Number stations around the room, put a code on each, and make one counter per circuit with one tag per station. A coach can carry one phone, walk the room, scan a station and add rounds for whoever is on it, or use Grid view where each station is a colored tile with its own minus and plus buttons, timer and stopwatch.
For a class, a step equal to one round and a target equal to planned rounds keeps it simple. The target progress on each tile shows at a glance which stations are behind.
Turn on lock for the counter between rounds if the phone sits on a bench where people put bottles; locking blocks accidental taps until you unlock it.
How can a trainer use station labels with several clients?
Make a category per client and copy the same tag structure into each client's counters. Station codes can repeat across clients because the code points you to the station; you pick the client's counter first. If you share a phone with another trainer, agree on naming rules before anything else, because exports are only as clean as the labels.
Client data is stored on the phone, with no account and no Counter App cloud. To move a client's counters to a new phone, make a backup ZIP (with photos, optionally compressed) and import it with the preview, choosing replace, copy or skip for duplicates.
A hypothetical home gym
Picture a garage with one rack, a bench, adjustable dumbbells and a rower. The owner prints five labels: RACK, BENCH, DB, ROW, FLOOR. Two counters exist, "Day A" and "Day B". On Day A, the RACK tag is squats with a target of 25, the BENCH tag is presses with a target of 25, and the ROW tag is set to step 100 with a target of 2,000 metres logged in hundreds.
Every session takes the same shape: scan, count with the volume keys, start the tag's timer, write the load. After six weeks, the owner exports Events and Notes and sees, in the example, that bench sessions were consistently shorter than squat sessions because rest timers had been set to 2 minutes instead of 3. One edit fixes it.
The numbers here are illustrative, but the pattern is the point: the labels make logging fast enough that the data exists to learn from.
Practical details
- Counting works offline at the rack; the app goes online only for optional notifications, update checks and map tiles.
- Tag display can be expanded, collapsed, or collapsed except the most recent, which keeps a long session tidy.
- Deleted counters go to trash and can be restored.
- Themes, dark mode, size presets and font scale from 0.7 to 1.5 help read the screen at arm's length.
- Counter App — Tally & Clicker needs Android 12 or later and is free to download with no ads; try it free for 3 days, then choose a yearly or monthly plan or a one-time lifetime purchase.
Get the app at counterapp.online.
Frequently asked questions
Can an exercise tag really hold a barcode or QR code?
Yes. Every tag inside a counter can store a barcode or QR value, scanned with the phone camera or typed by hand.
Do gym station labels need a special barcode format?
This workflow requires no particular format. Print whatever your label printer produces, test that the phone reads it, and keep a typed fallback code on the label.
How can a lifter count reps without touching the screen?
Turn on volume-button counting in settings. The keys can add or subtract a step, also in the background and on the lock screen, and the feature is off by default.
Where is the weight lifted recorded in a rep counter?
In a note on the count event or on the tag. Notes appear in history and on the All Notes screen, and they can be exported.
Can training sessions logged with station labels be reviewed on a computer?
Yes. Export CSV, Excel (XLSX) or an HTML report, and include only the sections you need from Summary, Events, Notes and Locations.
Can each exercise have a different rest timer?
Yes. Each tag keeps its own timer, with presets from 30 seconds to 10 minutes and manual input for values such as 90 seconds.
What should happen when a station label will not scan?
Type the human-readable code printed under the symbol on the manual entry screen, then re-print the label larger if the problem keeps returning.