Counter App

Count Building Materials with QR Codes and Barcodes
Key takeaways
To count building materials with QR codes, label each rack or bundle with a readable QR label, store that code on a matching Counter App — Tally & Clicker tag by scanning or typing it, set the tag's step to the counting unit, then count each stack physically and tap. Codes speed identification; they do not count for you.
- QR or barcode labels on a building site do not count material; the labels make sure each tap lands on the right material tag.
- A tag in Counter App — Tally & Clicker can store a barcode or QR value, scanned with the phone camera or typed in by hand when a label is damaged.
- Building material labels should carry human-readable text such as the material name and unit next to the code, and be laminated against site weather.
- A delivery check in Counter App works by creating a dated counter with one tag per ticket line and each target set to the ticket quantity.
- Counter App — Tally & Clicker runs on Android 12+ and is free to download with no ads; try it free for 3 days, then choose a yearly or monthly plan or a one-time lifetime purchase.
On a busy site, the hardest part of counting is often not the counting. It is knowing which stack you are looking at. Two pallets of block in slightly different sizes, three bins of hangers that look the same from a metre away, OSB in two thicknesses under one tarp: these are where the numbers get crossed. A printed code on the rack, linked to the right tag on your phone, removes most of that guesswork.
This guide covers how to plan labels, connect them to Counter App on Android, and run a scan-and-count walk. It also covers the cases where codes don't help, because there are some.
Why use QR codes to count building materials?
Codes don't count anything for you. You still put eyes on the stack and tap for each unit or bundle. What a code does is make sure the tap lands on the right line.
The benefits are practical:
- Identification is fast. The rack label names the tag, and the code stored on that tag ties the two together. Less guessing between similar names.
- New crew members don't need to know the stock. They don't need to tell 2x6 plates from 2x6 studs by eye if the rack says which is which.
- Delivery checks become line-by-line. If the supplier's paperwork carries codes, you can match each line to a tag.
Planning your labels
Before printing anything, decide what a label represents. There are three common options, and you can mix them:
- Location labels on racks, bays or bins. The code means "this shelf", and the tag counts whatever lives there. Good when storage is fixed.
- Material labels on bundles or pallets. The code follows the material when it moves. Good for big items that travel between areas.
- Supplier codes already printed on packaging. Free to use, but you depend on the supplier being consistent.
Keep label text human-readable as well as scannable. Print the material name and unit next to the QR code, for example "Joist hangers 2x10 (box)". When the scanner fails, someone can still read it and type the code.
Laminate or sleeve the labels. Site dust, rain and pallet straps are hard on paper. Put them at eye height on the end of the rack, not behind the stock where nobody can reach them once the bay is full.
Setting up the app
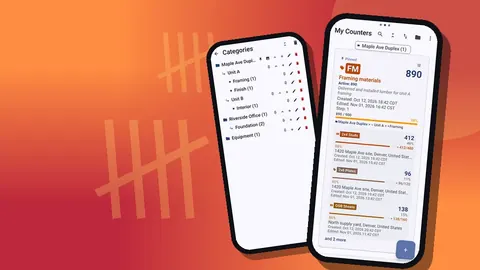
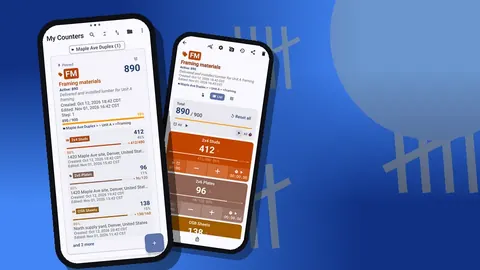
In Counter App, a counter holds tags and each tag can carry a barcode or QR value. Set up one counter per storage area and one tag per labelled location or material.
For each tag:
- Label and color. Use the same wording as the printed label so the screen matches what you see.
- Step. Set it to the unit you count in. A tag for banded studs might step by the bundle size; a tag for boxes steps by 1. Any value from 1 to 100 works.
- Target. Optional. Use the planned quantity or the delivery quantity, and choose whether to count up to it or down from it.
- Barcode. Scan the printed label with the camera to store its value.
- Location. A GPS point, a pin on a map, or typed text such as "Container 1, bay 3".
Test one label of each type before you print the whole batch. Lighting in containers, reflective laminate and small print can all make scanning harder, and it is cheaper to find out with five labels than with fifty.
What if a rack label won't scan on site?
Some labels will be torn, wet or simply too small. Counter App lets you type the barcode or QR value by hand, so the printed digits under the code are enough. Train the crew to type when a scan doesn't work within a few seconds rather than repeatedly waving the phone at a muddy label.
If the same label keeps failing, reprint it. One bad label slows every count that passes it.
The scan-and-count walk
A walk with codes looks like this:
- Arrive at a rack and identify the tag using its label.
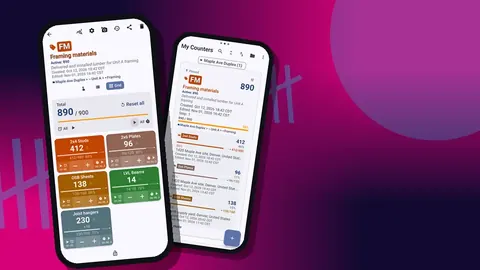
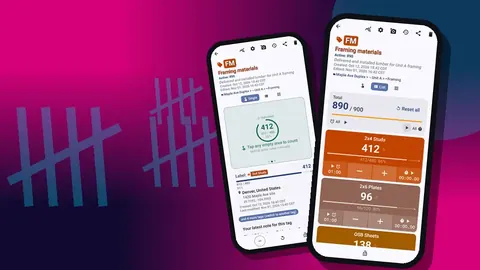
- Switch to Single view if you want one large counter on screen. It shows a big circular count for the tag, its target progress, the tag's location and the latest note.
- Count the stack physically and tap plus for each unit, or once per bundle with a bundle-sized step.
- Tap minus to correct a mistake. The correction is logged as a separate event.
- Add a note for anything unusual.
- Move to the next rack.
If you prefer seeing everything at once, List view shows every tag as a row with its own buttons. Some crews scan into Single view for accuracy and switch to List view at the end to check the totals.
How do you check a lumber delivery with QR codes?
Deliveries are where codes earn their keep. Here is a routine for checking a load:
- Create a counter named after the delivery, with the date: "Delivery 22 Oct, lumber".
- Add a tag per line on the delivery ticket, with the target set to the ticket quantity.
- As material comes off the truck, identify each item, find its tag and count it.
- When unloading is done, the list shows which lines reached their targets and which are short or over.
- Photograph anything damaged and attach it to the tag.
- Note the driver's name and ticket number in the counter's notes.
This doesn't replace signing the ticket, but it gives you a timestamped record if you need to dispute a shortage.
Photos as evidence
A coded material tag can hold as many as six photos. On a coded system, useful photos are the label itself (so the code is on record), the stack as delivered, and any damage. The photo editor lets you add text or brush marks in one of six colors, with a choice of fonts and styles, so you can circle a broken strap or write "wet" across a sheet.
The all-photos gallery shows pictures from every tag in one grid, each labelled with its tag and date. It is a quick way to look back over a delivery without opening tags one by one.
Reviewing what happened
The history logs every count with the exact time, the step, the value before and after, and the tag it belongs to. Icons show where an event has a note, a photo or a location. Reading the history after a walk is a good way to spot double counts, like two plus taps a second apart on a tag that should have changed by one.
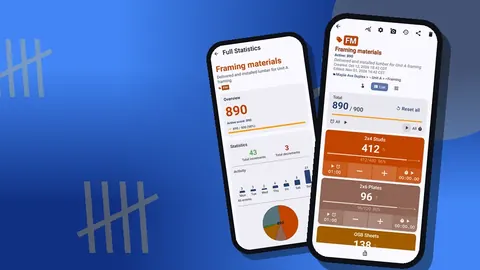
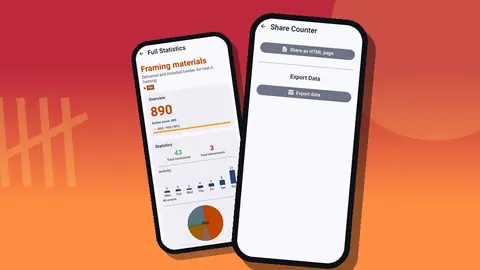
The dashboard summarises the counter with total against target, increments and decrements, a seven-day activity chart and a pie chart by tag.
Exporting coded counts
When the walk or the delivery check is done, export it. CSV and Excel (XLSX) files work in any spreadsheet. An HTML report embeds the photos, which is useful for a supplier claim. For a supplier claim, tick the Summary, Events, Notes and Locations sections you need.
The coded counts are kept on the phone, with no account and no Counter App cloud, so you pass the record on as an export file or a ZIP backup.
Training the crew on the system
A coded system only works if everyone uses it the same way. Spend ten minutes on a short briefing before the first walk rather than fixing mistakes for a month afterwards.
Cover four points. First, what each label means: a location or a material, and what unit the tag counts in. Second, the order of operations: identify the tag by its label, count the stack physically, tap, then add a note if anything looks odd. Third, what to do when scanning fails: type the printed code, and tell whoever maintains the labels. Fourth, who owns which counters, since each phone keeps its own data and there is no live sync between devices.
Pair a new crew member with someone experienced for their first walk. Reading the history together afterwards is a useful way to spot habits worth correcting, such as tapping before the stack has been counted.
Common mistakes
- Labelling before agreeing units. A label that says "studs" without "pcs" or "bundles" invites the same confusion codes were meant to fix.
- Hiding labels. A label behind stock is a label nobody scans.
- One code for two things. If two tags carry the same code, you lose the main benefit.
- Skipping the test print. Check scanning in the real storage light before printing in bulk.
- Never retiring old labels. When a bay changes use, change its label and its tag the same day.
Where this fits
Codes are worth it for fixed storage, repeat materials and frequent deliveries. For a one-week job with three materials, a well-named tag list is enough. Start with the area that causes the most confusion, label it, and see whether the count gets faster. Counter App runs on Android 12 or later and is free to download with no ads; try it free for 3 days, then choose a yearly or monthly plan or a one-time lifetime purchase.
Get the app at counterapp.online.
Frequently asked questions
Can a building material tag store a QR code scanned on site?
Yes. A Counter App tag stores a barcode or QR value, read with the phone camera or typed by hand when a label is too dirty to scan.
Does labelling a lumber yard need a dedicated barcode scanner?
No. Any QR generator and a label printer, or paper in a plastic sleeve, will do; the phone camera handles the scanning.
Besides a code, what can a material tag on a rack carry?
Its own count, step and target, a color, a GPS point or typed address, up to six photos, a timer, a stopwatch and a link.
Does scanning rack labels in a site container need internet?
No. Counting and scanning in Counter App work offline; optional notifications, update checks and map tiles are the only things that go online.
Will my supplier's barcode labels scan in Counter App?
Counter App scans barcodes and QR codes with the camera, but no list of specific formats is published, so test a few of your real labels before printing a full batch.
Should site QR labels mark locations or materials?
Both work. Location labels suit fixed racks and bins, while material labels on bundles or pallets suit stock that moves between areas.
What should a construction label show besides the QR code?
The material name and counting unit in plain text, for example "Joist hangers 2x10 (box)", so anyone can read it and type the code if scanning fails.